In order to ensure that the machine boots up with only the OS that the manufacturer trusts, Secure Boot is a collection of programmes that determines whether your operating system is secure to use on a computer.
You are advised to install Windows using the more recent UEFI mode because it has more advanced security features like Secure Boot, TPM 2.0, and others.
Although the feature is enabled on Windows 11 computers, some users noticed that Secure Boot is disabled while verifying system information.
You have come to the proper site if you are worried and looking for answers to this specific problem. I’ll show you several tried-and-true solutions to fix the issue on your Windows 11 device in this post.
So without further ado, let’s begin.
Fix for Windows 11 Saying Secure Boot Enabled Isn’t
Some Windows 11 customers claimed that even though the Secure Boot function was already activated from the BIOS, after installing Windows 11, it appeared to be disabled on their computer.
On a Windows device, Secure Boot may occasionally be inadvertently disabled due to a missing configuration. Therefore, you should not worry about that. The problem can be fixed by correctly enabling the Secure Boot feature.
So, take the actions I’ve listed below to fix the issue.
The steps to resolve the Secure Boot enabled but Windows 11 says it’s not issue are as follows:
Activate Secure Boot.
You may easily enable Windows 10’s Secure Boot feature if your secure boot settings are in User Mode.
On the other hand, take the following actions if the secure boot settings are in Setup Mode:
- If Secure Boot is enabled, turn it off.
- If it is Standard, change it to Custom.
- Set Factory Defaults to Factory Standard.
- Turn on Secure Boot.
- Verify that your issue has been resolved. If not, proceed to the next suggestion.
Restore original keys
You can resolve the problem with your PC by resetting the factory keys in your BIOS. To recover the factory keys, adhere to the instructions below.
The steps to reset the keys are as follows:
- Start your computer’s BIOS.
- Choosing the Security tab.
- Select Secure Boot > Restore Factory keys from the menu.
- To restore factory defaults, press Enter.
- Exit the window after saving the changes.
- Verify that your issue has been resolved.
How to repair Error running Windows 11 on this PC
Microsoft debuted a next operating system, Windows 11, in October 2021. Microsoft outlined a few system requirements in Windows 11 to ensure the OS functions properly on a PC.
To run Windows 11 on your device, one of the fundamental needs is Secure Boot and TPM 2.0.
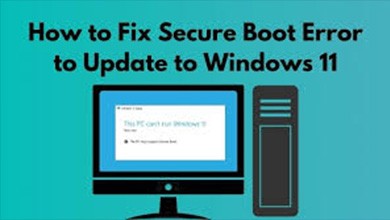
The mistake When you try to install Windows 11 on your PC, but your device doesn’t fulfil the minimal system requirements to run Windows 11, the message “This PC can’t run Windows 11” shows on your screen.
See More: Fix Windows 10 stuttering on computers
To operate Windows 11 on your PC, your device must comply with Secure Boot, TPM 2.0, and other system requirements. You cannot install Windows 11 on a computer that satisfies all other system requirements but does not have Secure Boot and TPM 2.0 enabled.
Make sure Secure Boot and TPM 2.0 are enabled on your computer first. The actions listed below should be followed in order to enable Secure Boot and TPM 2.0.
Here is how to repair it: Windows 11 won’t run on this computer:
Set UEFI Secure Boot to on
The initial tried-and-true approach for fixing Enabling UEFI Secure Boot on your Windows 10 device will fix the This PC can’t run Windows 11 issue.
To enable UEFI Secure Boot on a Windows 10 computer, follow these steps:
- By holding down Win+I, you can access Windows Settings.
- On the menu panel on the left, click the Update & Security tab.
- Choose Recovery from the menu.
- Now click on Restart.
- Restarting your computer after a little delay is recommended. After restarting, a blue screen with sophisticated options will appear.
- Select Troubleshoot by clicking.
- Click on Advanced Options.
- UEFI Firmware Settings should be chosen. The Secure Boot option can be found in the Security, Boot, or Authentication menus.
- Activate the Secure Boot function.
- Restart your device after saving the modifications.
Activate TPM 2.0
Another tried-and-true solution to the This PC can’t run Windows 11 issue is to enable TPM 2.0 on your Windows 10 device.
Your PC will be able to run Windows 11 because the TPM 2.0 is enabled, satisfying the system requirements.
The following steps will enable TPM 2.0 on a Windows 10 computer:
- By holding down Win+I, you can access Windows Settings.
- On the menu panel on the left, click the Update & Security tab.
- Choose Recovery from the menu.
- Now click on Restart.
- Restarting your computer after a little delay is recommended. After restarting, a blue screen with sophisticated options will appear.
- Select Troubleshoot by clicking.
- Click on Advanced Options.
- UEFI Firmware Settings should be chosen. Under the Advanced, Security, or Trusted Computing menu, look for the TPM 2.0 configuration.
- Activate the TPM 2.0 function.
- Restart your device after saving the modifications.
How to Fix the Secure Boot Error: This PC must support
One of the key prerequisites for setting up and using Windows 11 on your device is Secure Boot.
You may experience the This PC must support Secure Boot issue if the Secure Boot function is deactivated on your computer. If this occurs, you cannot use the Windows 11 operating system without turning Secure Boot on.
To run Windows 11, however, you must first enable Secure Boot on your device before attempting to install Windows 11.
To enable UEFI Secure Boot on a Windows 10 computer, follow these steps:
- By holding down Win+I, you can access Windows Settings.
- On the menu panel on the left, click the Update & Security tab.
- Choose Recovery from the menu.
- In the box next to Advanced startup, select Restart now.
- Restarting your computer after a little delay is recommended. After restarting, a blue screen with sophisticated options will appear.
- Select Troubleshoot by clicking.
- Click on Advanced Options.
- UEFI Firmware Settings should be chosen. The Secure Boot option can be found in the Security, Boot, or Authentication menus.
- Activate the Secure Boot function.
- Restart your device after saving the modifications.
How to Check Windows 10’s Secure Boot and TPM State
TPM 2.0 and Secure Boot are required for Windows 11 to run on your device. Therefore, you must first check to see if Secure Boot and the TPM are enabled. Because Windows 11 cannot be installed on a device that does not support TPM 2.0, you must also be aware of this information.
Are you unsure if Secure Boot and TPM are active on your Windows 11 or Windows 10 computer?
To check the status of Secure Boot and TPM, follow the instructions below. The methods listed below make it simple to check the Secure Boot and TPM status of your device.
Note that Windows 11 is compatible with the methods listed below for examining the Secure Boot and TPM states.
The steps to check Windows 10’s Secure Boot state are as follows:
- By hitting Win+S or by clicking the Search icon on the taskbar, you can access the Windows Search panel.
- To open the System Information window, type System Information into the search field, click the search result, or press the Enter key.
You can discover your computer’s Secure Boot State in the Item column. If the state is On, Secure Boot is activated. Secure Boot is not active if the state is Off.
The steps to check the TPM version on Windows 10 are as follows:
- By hitting Win+S or by clicking the Search icon on the taskbar, you can access the Windows Search panel.
- Fill up the search bar with tpm.msc.
- To open the Trusted Module Platform (TPM) Management window, either click the search result link or press the Enter key. You can find the current TPM status on your PC under the Status column.
The TPM version is located next to the Specification Version under the TPM Manufacturer Information section.
Final Reflections
Windows 11 requires Secure Boot and TPM 2.0, but there are other key needs as well, including processors that run at 1 GHz or higher and have two or more cores, at least 4 GB of RAM, and 64 GB or bigger storage devices, among others.
Secure Boot may occasionally be activated even though the system displays it as disabled. It’s not a major deal, but you still need to correct it. You can quickly and easily solve the issue in a matter of minutes by using the procedures I stated earlier in this essay.
I’ve now gone through two distinct difficulties that Windows users may run into when attempting to install Windows 11 on their computer. I also provided several tried-and-true remedies to the problems.
All OK, buddy. If you think your friends will benefit from reading this content, please forward it to them.
I bid you farewell. I’ll see you in the next.